

Synology
In order to allow the Zabbix Server to monitor your NAS, we need to enable SNMPv3 on it.
After logging in into your NAS, navigate toControl Panel >> Terminal & SNMPand select the tabSNMP. Make sure SNMPv3 is enabled as follows::
Click onApplyand you are done.
The template we are going to use doesn’t come installed in Zabbix Server by default, so we are going to import it first. Visit thecommunity template pageand navigate toStorage_Devices >> Synology >> template_synology_diskstation_snmpv3 >> 6.0and click on
template_synology_diskstation_snmpv3.yamlfile, followed a click onRawbutton. Save the file locally.
Go toConfiguration >> Templatesand click onImport.Click onChoose filein the configuration dialog, select the YAML file previously saved and click onImport. Another dialog will be displayed with the actual content being imported. Click onImport.
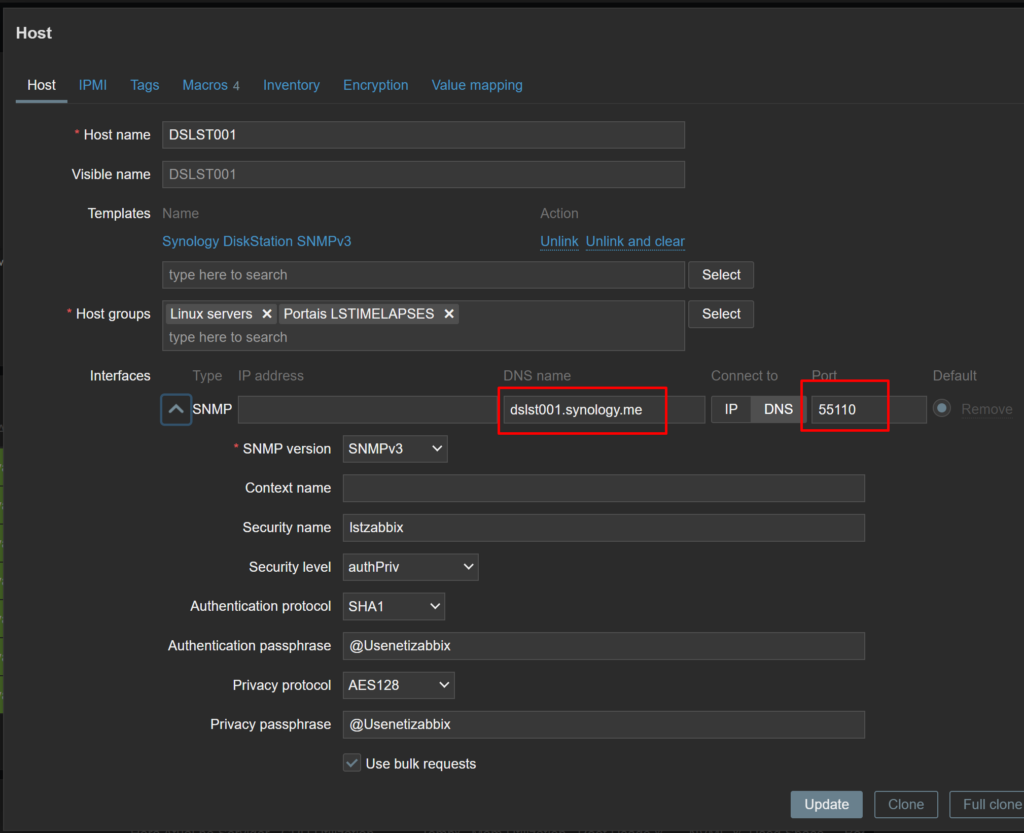
Although we don’t need to install a Zabbix Agent on the Synology, we still need to create a Host on Zabbix Server to specify the NAS address, etc
Go toConfiguration >> Templatesand click onCreate Hostbutton. When the configuration dialog open, theHosttab should be the default one. Fill in the following fields and leave the rest as-is:
Configure o redirecionamento da porta no Load Balance

Faça um teste com snmpwalk a partir do servidor zabbix
snmpwalk -v3 -l authPriv -u lstzabbix -a SHA -A “@Usenetizabbix” -x AES -X “@Usenetizabbix” dslst001.synology.me:55110